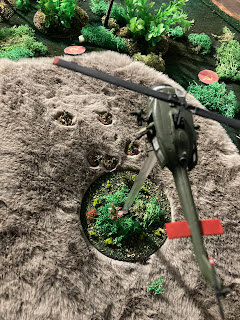
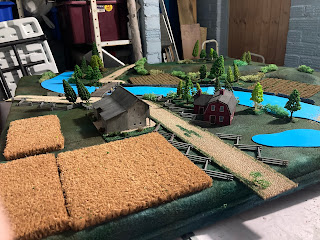
Joshua's Bridge a sleepy farming settlement on the banks of the Ambalt River a winding, deep body of water that passes down through Tenant County Virginia. Until now this small community has had little to do with the war that rages around then. That all changed when the Confederate Army began a march up the road that passes through Joshua's Bridge. Joshua's bridge is the only point in a fair distance that the river can be crossed either by the wooden bridge or in the summer months by a ford next to Joshua's farm. Having got wind off the Confederate march the Union Army has dispatched three brigades to deny the Conderate army free passage up the road. As the sun rises on a new day a two brigade screening force for the Confederate Army arrives on the western side of the river south of the farm with orders to cross and hold the far bank to ensure the Armys free passage,
With our fictional ACW scenario set lets look at the two opposing forces
Union Order Of Battle:
1st Cavalry Brigade Col. Smyth
2 x Standard Cavalry Regiments
2nd Infantry Brigade Col.Smith
3 x Standard Infantry Regiments
1 x 4 Gun Artillery Battery
3rd Infantry Brigade Col. Wilson
3 x Standard Infantry Regiments
1 x 4 Gun Artillery Battery
Confederate Order Of Battle:
1st Brigade Col. Thompson
3 x Standard Infantry Regiments
1 x Standard Cavalry Regimen
1 x 4 Gun Artillery Battery
2nd Brigade Col. Jasperz
3 x Standard Infantry Regiments
1 x Standard Cavalry Regimen
2 x 4 Gun Artillery Battery
Battle Commences
Turn 1 (8am)
Union Cavalry are ordered to advance with haste to cross the bridge and establish a bridgehead to cover the crossing of Smiths 2nd Infantry Brigade.
Wilsons 3rd Brigade are ordered to march for the hill overlooking the ford to oppose any crossings attempted by the Reb forces.
On the far side of the river Thompsons 1st Brigade deploy in line and begin advancing through the fields towards the bridge.
Jasperz 2nd Brigade enter the field in column and proceed towards the ford.
Turn 2 (9am)
All Union commanders failed their command rolls the march columns were only able to move forward slowly.
Over the river the 1st CSA Brigade advance in line through the fields while the Cavalry Regiment push ahead for the bridge.
2nd CSA Brigade arrive at the ford and begin to cross with the cavalry leading and forming a screening line on the opposite bank

Turn 3 (10am)
The first of the cavalry regiments makes it over the bridge , dismouts and forms a firing line in the trees opposite the bridge, The second cavalry regiment and Smyth are close behind.
Smith and Wilson both fail to order their forces so both brigades continue a hesitant advance in march columns.
1st CSA Brigades Cavalry successfully dismount into a firing line and release an ineffective volley at the Union Cavalry in the tree line. The infantry regiments continue their slow advance through the fields and the Brigades artillery is still back on the road haviong been delayed by 2nd Brigades march up the road.
The 2nd CSA brigade cavalry are successfully ordered forwards towards the hill but confusion reign at the ford and the infantry and artillery are slow to cross
Turn 4 (11am)
The 1st US cavalry regiment lay fire into the CSA Cavalry from the treeline but to no effect. The 2nd Regiment makes it over the bridge but is unable to dismount and form a fire line.
Smiths 2nd Infantry Brigade deploy into line across the ridge facing the river and the guns are un-libered
Wilsons 3rd Brigade again struggle with orders so can only continue a hesitant march in column upto the crest of the hill facing the ford and the deploying CSA 2nd Brigade.
Thompsons 1st CSA Brigade infantry continue to advance their lines and the artillery finally unlimbers on the road. The Cavalry continue to swap ineffective fire with the Yankee Cavalry in the trees.
Turn 5 (12am)
1st and 2nd Regiments of the Union cavalry are over the bridge, 1st Rgt. are disordered by a volley of fire from the approaching CSA infantry
2nd Infantry brigade fails to receive orders and holds it's ground on the hill overlooking the Bridge.
3rd US Infantry Brg. deploy onto the ridgeline of the hill but the artillery get bogged down and remain limbered.
The 1st CSA Brg. receives no new orders so continues its march over the ford
2nd CSA Brg. are starting to make their presence felt at the Bridgehead with the infantry now able to bring their heavier fire.
A first shot from the 2nd Brigades Artillery falls short but high lights how exposed the union Caverly holding the bridge head are.
Turn 6 (1pm)
As the sun reaches it's peak both sides falter.
1st US Cav Rgt. end the turn disordered from CSA infantry fire, 2nd US Cav Rgt. are shaken by Artillery fire.
1st CSA Brg. front line and artillery pour on the fire at the bridgehead.
2nd CSA Brg. continue to move over the ford
Turn 7 (2pm)
The !st Cav brigade's Commander Col. Smyth rallies the second regiment while the 1st regiment continue to swap fire from the woods with the advancing Rebels
3rd US Brg. managed to get the guns unlimbered and ready to fire down on the ford.
The 2nd brg CSA artillery get some shots off
Turn 8 (3pm)
1st US Cavalry Brg. are taking a mauling but hold
2nd US Infantry Brg. stalls but from atop the hill 3rd Brg. starts to engage the Reb 2nd Brg, which has now mostly cleared the ford and started to deploy into lines,.
The 1st CSA Cavalry withdraw from the bridgehead in an orderly fashion and regroup behind Joshua's Farm
Turn 9 (4pm)
At the bridgehead the 1st Cavalry Brg. are still holding the line against the CSA 1st Brg.
2nd US Infantry Brg. however are still dithering on the other side of the river
3rd US infantry brg. are now in the fight engaging the CSA 2nd Brigade
Turn 10 (5pm)
For the next hour battle rages at the bridgehead and overlooking the ford with neither side gaining any advantage. 2nd US infantry Brg. Blunder their orders and wander off to the right taking them no nearer to relieving the beleaguered 1st Cavalry Brg. .
Turn11 (6pm)
2nd US Infantry Brg. finally form into attack columns and move to the bridge
On the far bank the US 1st Cavalry Brg. are still holding up the 1st CSA brg.
While the hill overlooking the ford is covered in gun smoke as the US 3rd Infantry Brg, and the 2nd CSA Brg. lines swap volleys
Turn 12 (7pm)
As the sun begins to set the 2nd US Infantry Brg. Falters and pauses at the bridge.
The beleaguered 1st US cavalry Brg. look on in horror, their efforts to hold the bridgehead wasted.
Over at the ford both sides continue to swap volleys of fire but the extra gun batteries of the 2nd CSA brigade are starting to swing the balance.
As darkness closes in the two sides draw apart at the bridge the Union Cavalry will use the cover of darkness to withdraw back over the bridge. At the ford the 2nd CSA Brg. infantry fall back from the hill and leave the artillery to harass the union troops atop the hill.
Conclusions
It's safe to say that the Union Forces failed to close the road down so the win goes to the CSA forces.
The US 2nd Infantry Brigade's failure to move over multiple turns undoubtedly prevented the Union securing the Bridge despite the heroic efforts of the cavalry brigade.
This was my first solo game with Black Powder and I'm impressed with how the Command rolls caused immense frisson that msde solo play easy out of the box, I'll still be looking at how other AI play can be integrated with Black Powder but for throw down games it works well.


